Audio Settings Setup
To setup the audio settings in your project you can either use the audio classes provided by the pack, or implement your own classes in the system
Using the provided audio sound classes
-
Go into the project settings
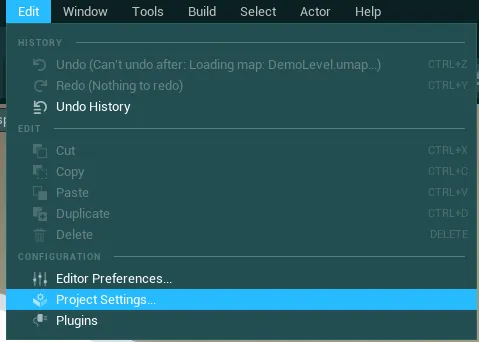
-
Under “Engine”, search for the
Audiocategory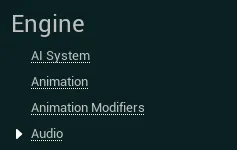
-
Now fill in the provided sound classes for the
Default Sound Class,Media Sound Class,Default Base Sound Mixwith the following values:SC_EOM_MasterAudiofor the first two,SCM_EOM_MasterMixfor the sound mix like on the image below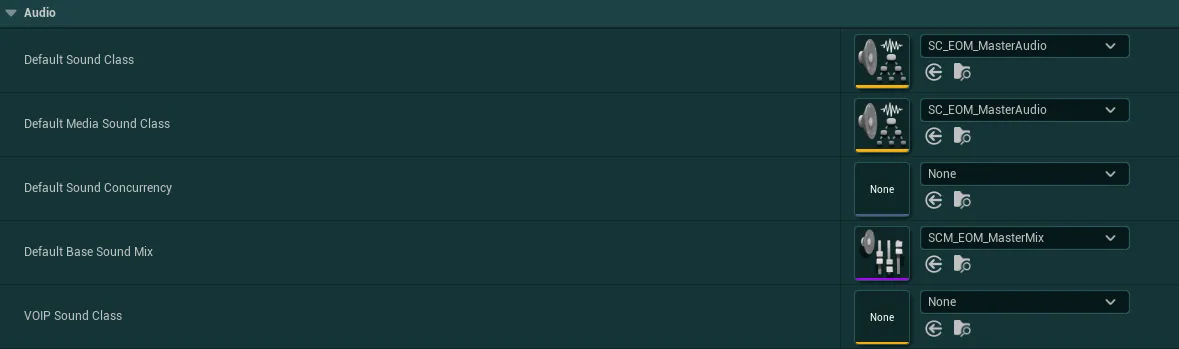
-
Then, go inside your Global Config Data Asset and locate the setting
Game Audio Classes, populate it with the corresponding values (SC_EOM_MasterAudioinMaster, etc. You can also find this setup inside the Demo Config Data Asset)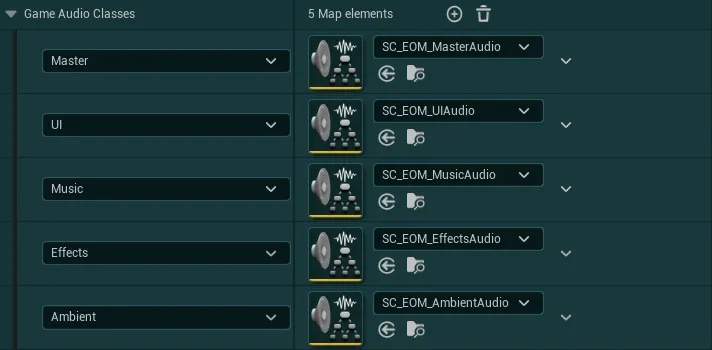
-
You then need to set the correct audio category for each sound wave/sound cue asset that you are using in your project.
To do this, in a Sound Wave asset or Sound Cue, search forClassunder the Sound Category and select one of the provided sound classes:SC_EOM_EffectsAudio/SC_EOM_MusicAudio/SC_EOM_UIAudio/SC_EOM_AmbientAudioIn a Sound Cue Asset
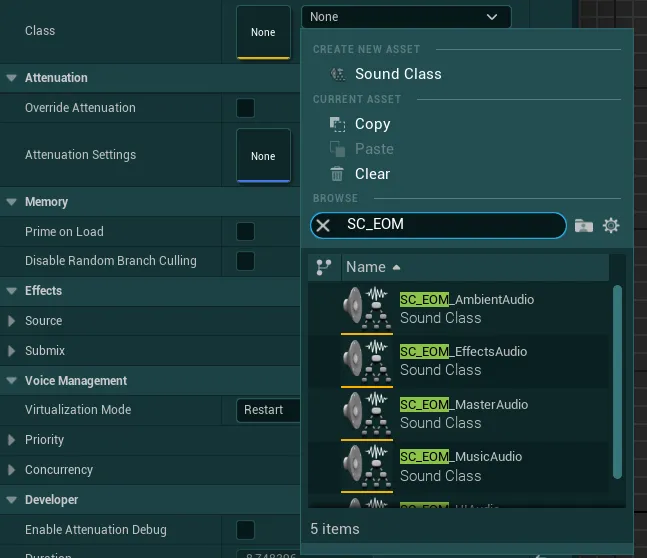
In a Sound Wave Asset
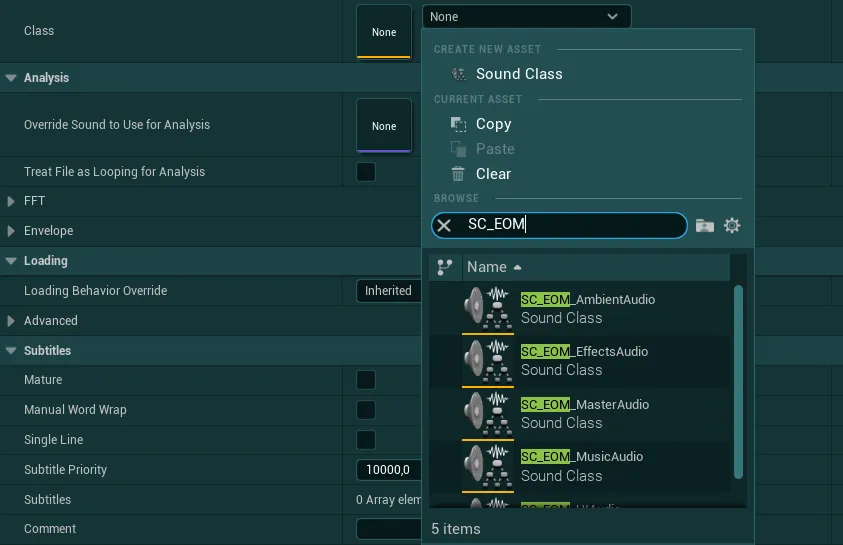
Using your own sound classes
- In order to use your own audio classes, you simply have to go inside your Global Config Data Asset and locate the setting
Game Audio Classes -
Once found, populate each category with the corresponding audio class from your system, here is an example using the demo sound classes that can also be seen inside the Demo Config Data Asset
-
The audio classes will now be controlled by the setting with the corresponding name inside the options menu. Check out the section just after if you wish to add new classes
Adding new sound classes/audio settings
If you wish to register new sound classes in the system, either existing custom classes or new classes alongside those provided by the pack, you can do the following:
-
If you are using the provided master sound class (
EasyOptionsMenu/Core/Audio/SC_EOM_MasterAudio), open it then drag a wire from “Children” to an empty space on the graph Type the name for this new class then press Enter. This will automatically generate a new sound class in the same folder as the master.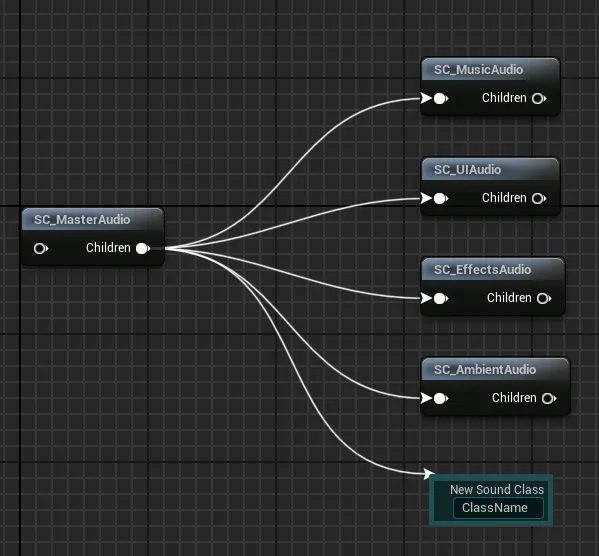
-
Then, open the enumeration
E_AudioClasseslocated in theEasyOptionsMenu/Datas/folder -
Add a new item with the
Add Enumeratorbutton then give it a name in the newly generated field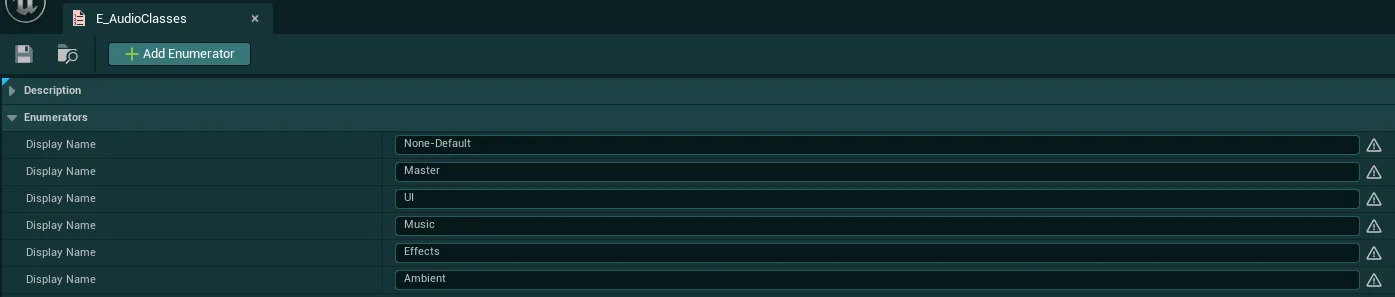
-
Then, go in the folder
EasyOptionsMenu/Core/SettingsManagers/AudioSettingsand duplicate any of the blueprint in it likeBP_SettingAudio_Master(Right Click > Duplicate or Ctrl + D)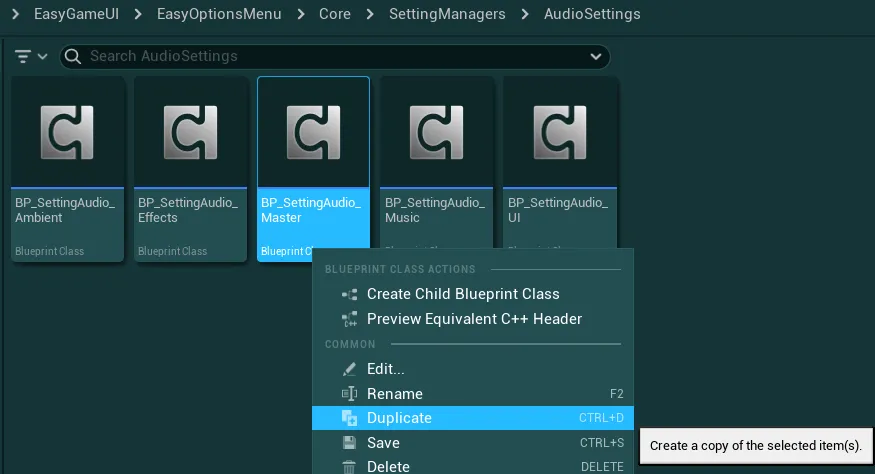
-
Give this new blueprint a name of your choice and open it, you will see the following parameters in the Details panel
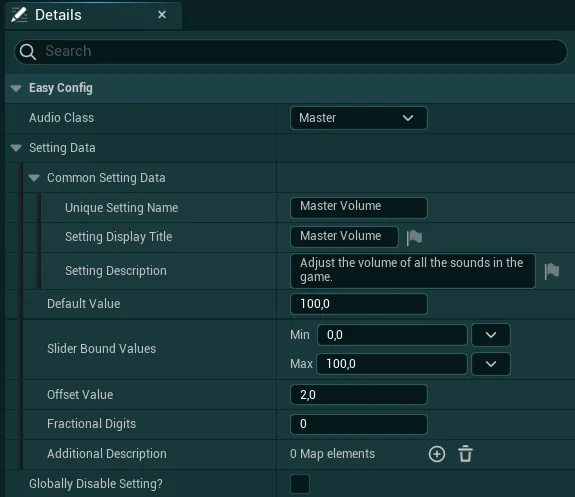
Audio ClassFirst select your created audio enum value in the dropdown of this variableSetting DataThen configure the setting to your liking (display name, description, values, etc.). Those will be used by the setting widget in the UI
-
Then, we simply need to add a widget for this setting in the
WBP_EasyOptionsMenuMain -
In the Hierarchy of the widget, search for any of the
Audio Setting(such asAmbient Audio Settingwhich I will use as example) then duplicate it (Ctrl+D)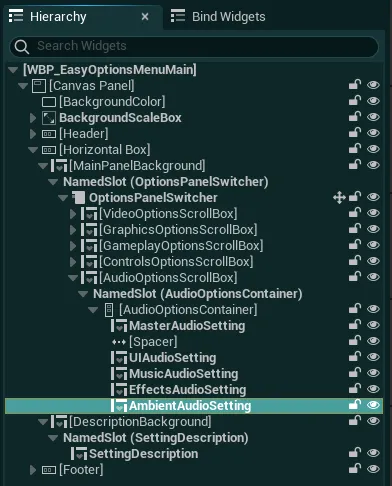
-
Give this widget a proper name and simply select the blueprint you just created in the
Setting Managervariable under theEasy Configcategory.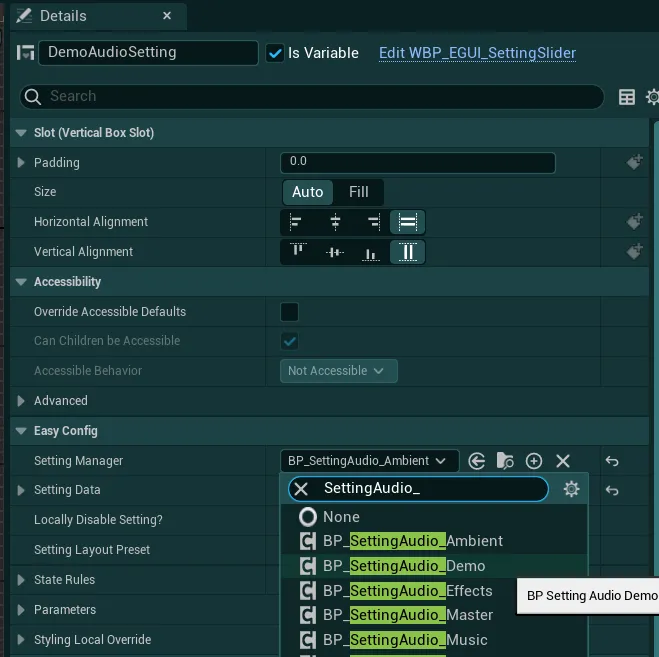
You don’t need to change anything else, the setting should be properly set up
-
Finally, we just need to reference the new audio class and setting in the Global Config to be registered properly by the system.
-
Open your Global Config data asset and in the variable
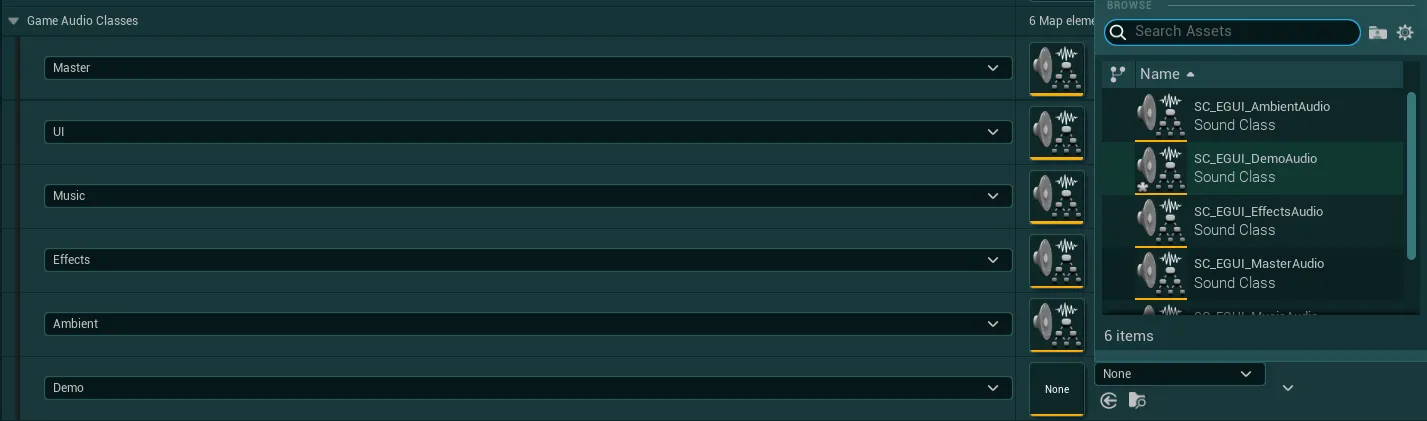
Game Audio Classes, add a new entry with the+button.Then in the dropdown of the new entry, select the enum value you added earlier and select the associated audio class
-
Lastly, locate the
Settings Listvariable and add the newly createdBP_SettingAudioblueprint class in it
-
Now compile and save all the edited blueprints and you are done!