Benchmarking Tool Setup
The Benchmarking Tool can be a great tool to help your players test their performances in your game, this section will go through the required setup to implement it in your project. If you wish to see a demo setup for this system, you can check it out on the L_EOM_BenchmarkDemoLevel map
-
To set up the system, you will need a level for it to run through. To do this, I would strongly suggest creating a new level made only for the benchmark run (by duplicating any of your levels for example), without any gameplay that could interfere such as a game hud, player interface or any gameplay elements that could disrupt the benchmark.
If you do not wish to create a new dedicated level, you have to make sure that none of these elements will interfere. You can do so by adding this small code to the begin play of any actor that could interfere or any elements that should be blocked during the benchmark run:
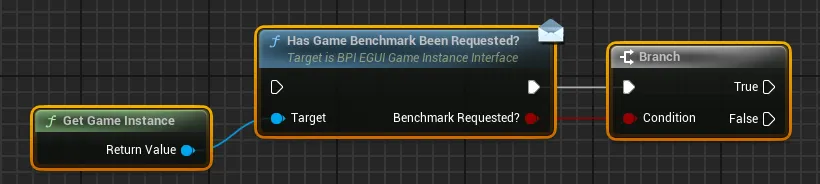
If True, the benchmark will be started and all gameplay elements should be disabled. If False, the actor can load as usual
-
Then, go to the folder
EasyOptionsMenu/EasyGameBenchmark/DemoContent/. Locate and duplicate theLS_BenchmarkTemplatelevel sequence, then drag&drop this new Level Sequence inside your world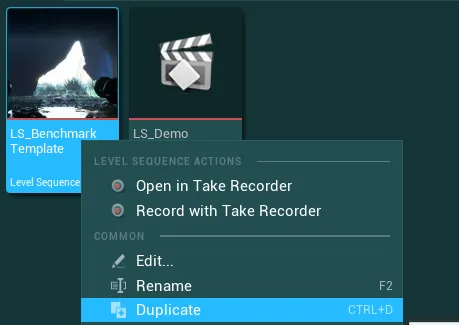
-
Then go back to the folder
EasyOptionsMenu/EasyGameBenchmark/and locate theBP_EasyGameBenchmarkHandler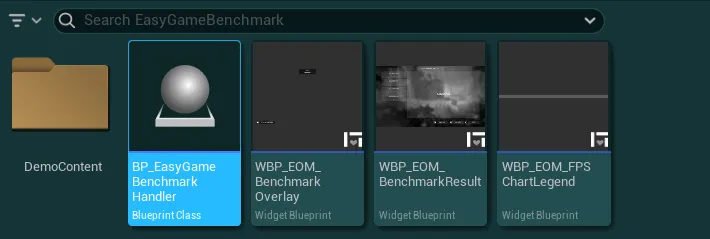
-
Place it anywhere in your world then go to the Details panel and in the
Level Sequence to Playvariable, add the reference to the level sequence you just placed in your world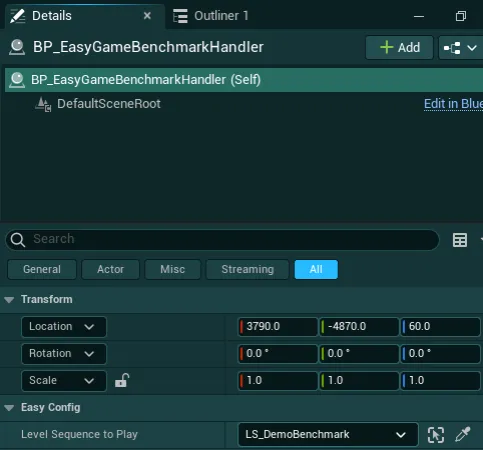
-
Then, open your Level Sequence (double click on the asset you duplicated) and proceed by adding camera positions to make the camera travel inside your world to your desired locations.
The camera path should ideally go through various areas of your map, including areas that can be expensive to run. Feel free to make the sequence longer if you wish, around 25 to 60 seconds is ideal.

-
Once this is done, click on the Events section, you will notice that 3 events are already placed for the start, end of the benchmark and a demo pause/resume event. Start by placing the start/end anywhere in your sequence that make sense.

I would strongly recommend leaving a few seconds at the begining of the sequence to allow the level to load properly before starting the benchmark.
-
You can then also use the Pause/Resume event anywhere inside your timeline. To do so, duplicate the existing
PauseOrResumeGameBenchmarkevent, then right click on it and hover thePropertiessection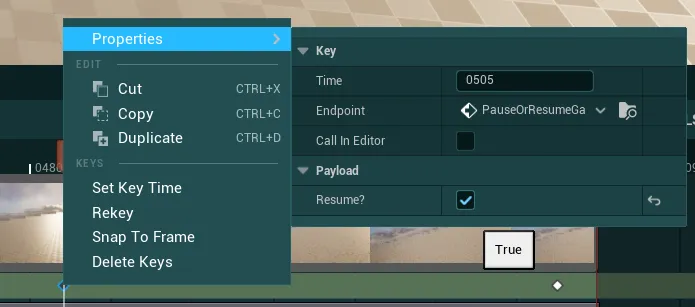
Inside this section, you can then select if that keyframe should pause or resume the benchmark capture based on the value of the variable
Resume?:- If True, the benchmark will start recording performances again (if it was paused previously)
- If False, the benchmark will stop recording performances. The Sequence will still keep running, only the FPS recording will be paused
This can be useful if you want for example to teleport to another location on the map, in which case you can pause the benchmark to avoid recording erroneous datas and then resume it once the tp is done
-
Finally, you can now open your Global Config Data Asset, set the
Enable Game Benchmarking Tool?setting to True and set yourGame Benchmarking Levelto your current benchmarking level -
Once all of this is done, you can now start the benchmark run while in game from the Options Menu with the button
Run Benchmark
Understanding the Benchmark results
Once the benchmark ended, you will be presented with a benchmark result like this image
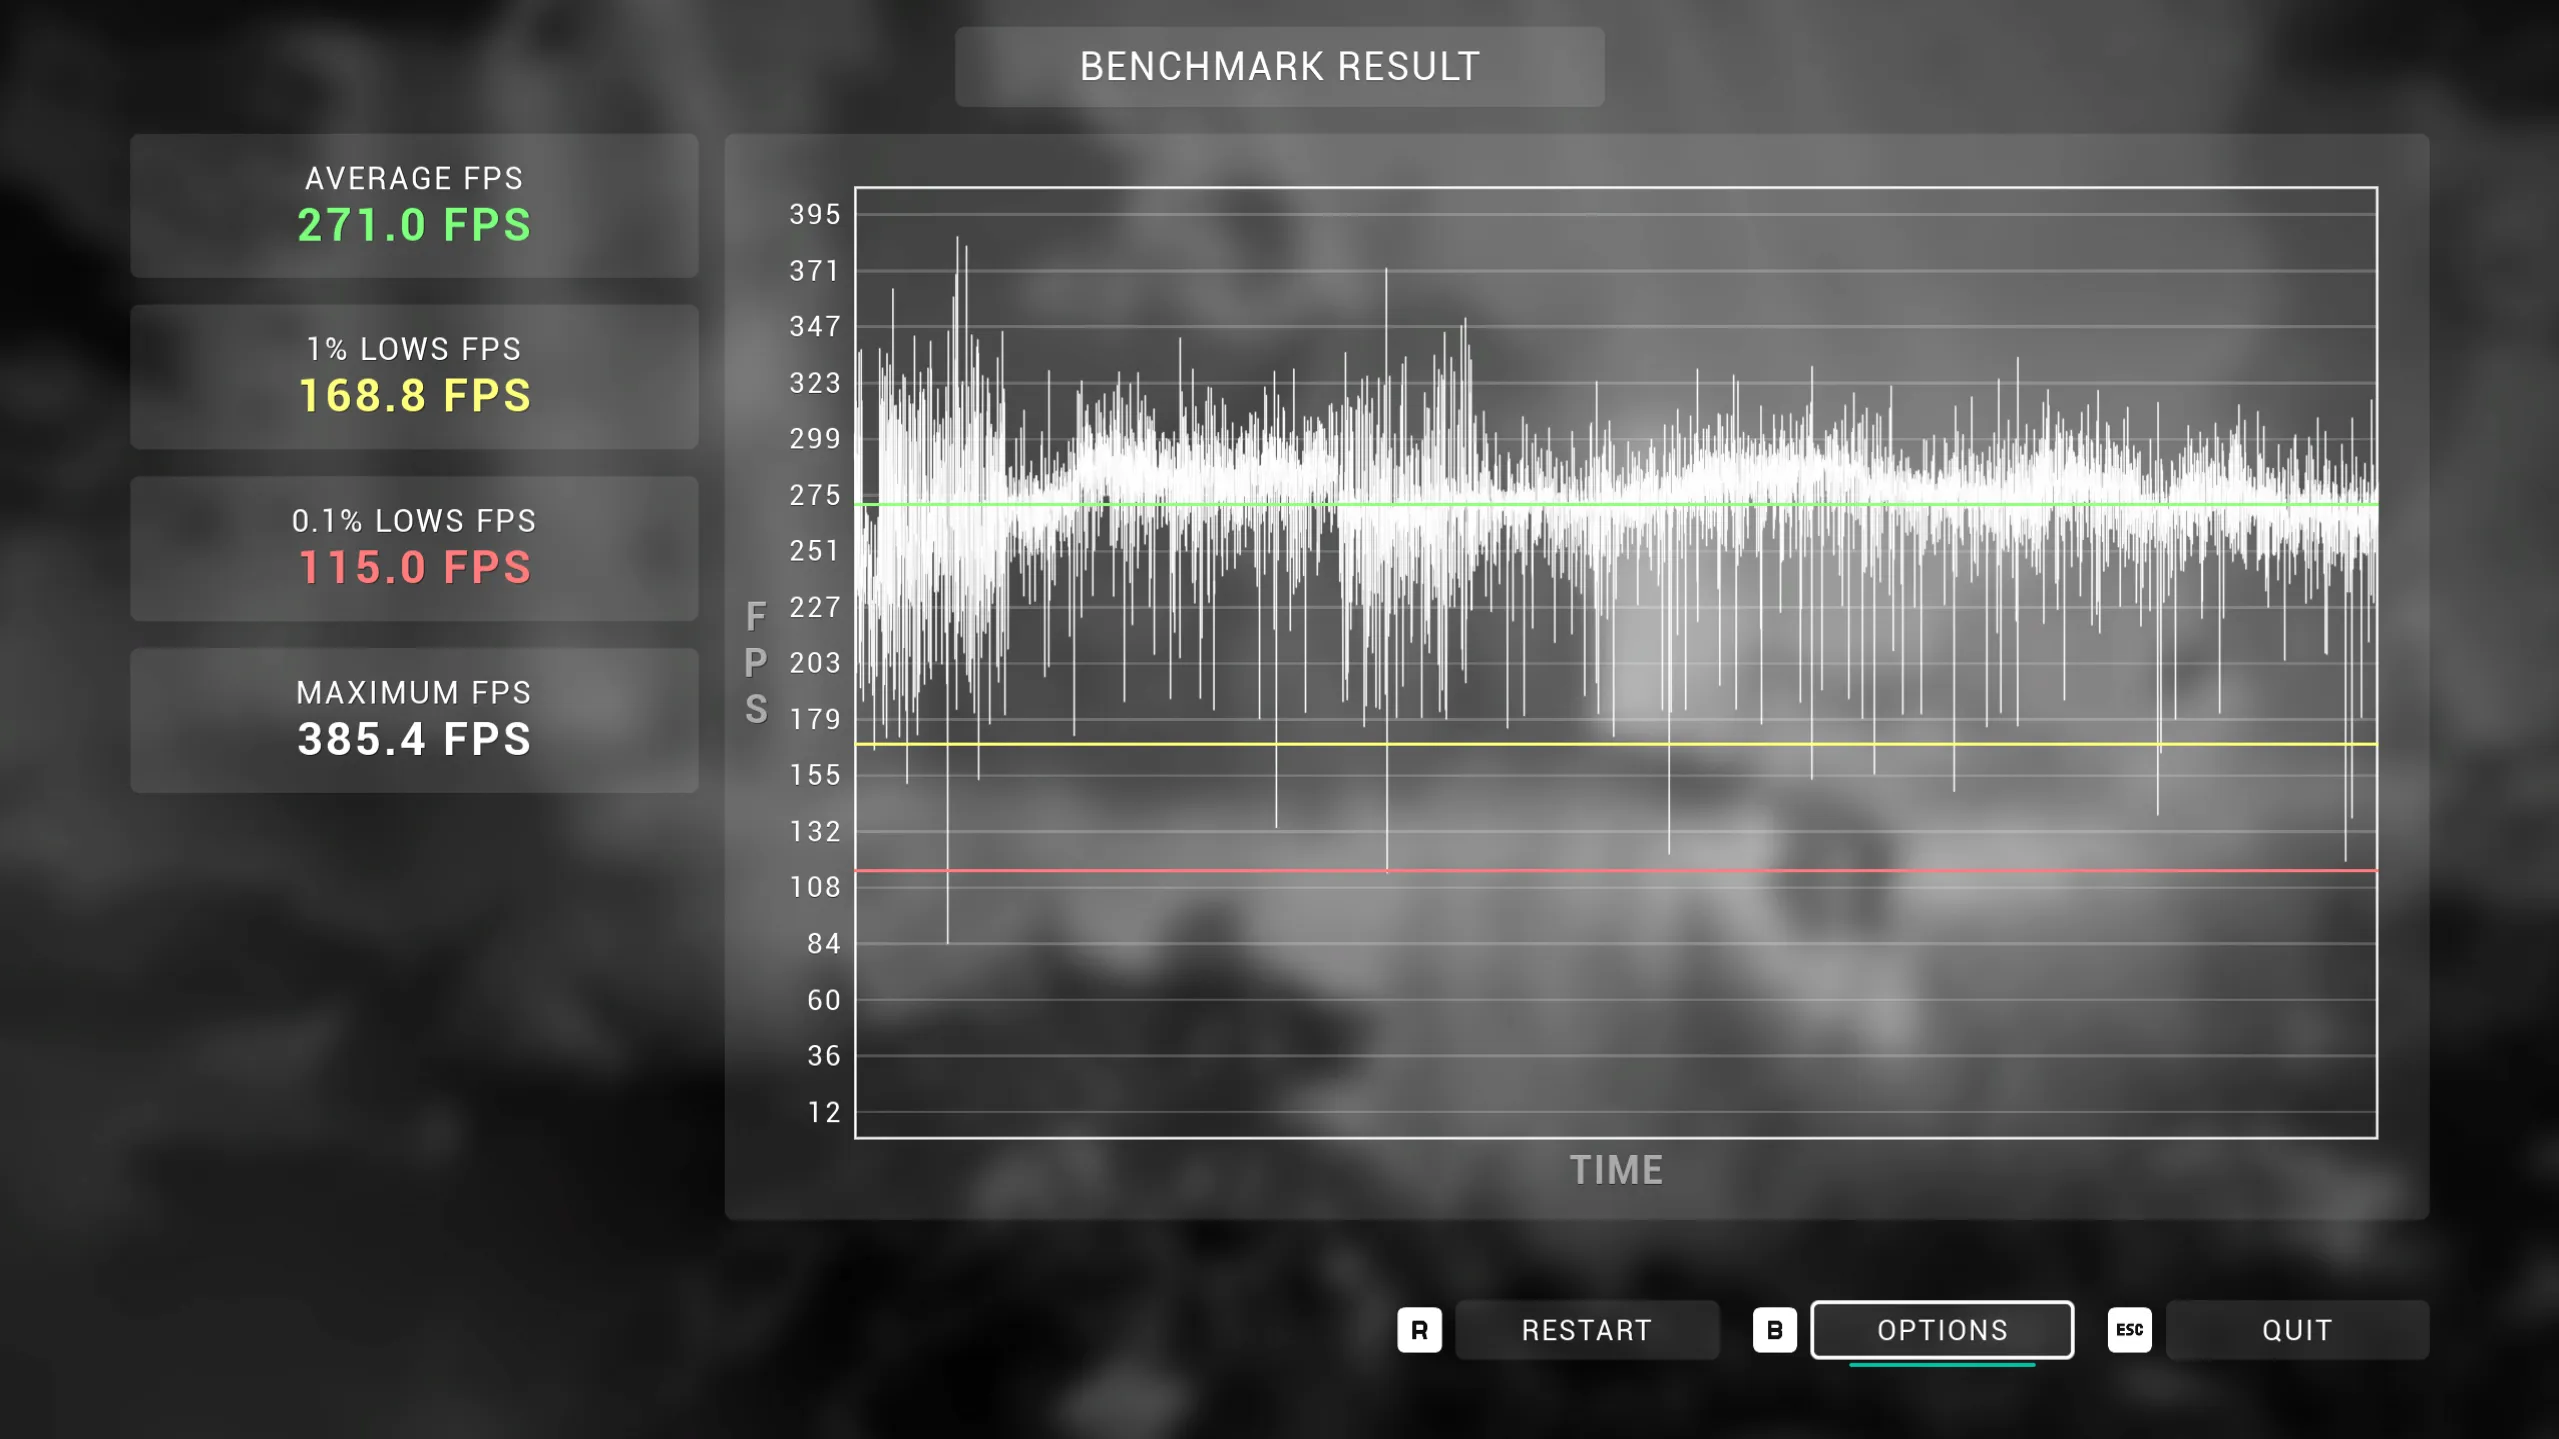
It will not look exactly like this depending on the performances characteristics of your run and hardware. It might even look like a perfectly straight line if the framerate has been perfectly stable.
This benchmark result contains various informations:
On the left side, you can see several framerate datas
Average FPSis the average framerate during the whole run, this can give a overview of the performances but can easily be biased by very high and very low framerates1% Lows FPSthis metric represent the 1% lowest framerates during the entire run. It can be a very useful to determine the overall stability of the framerate, the closer this metric is to the average, the smoother the framerate is.0.1% Lows FPSthis metric can also be used to determine the stability of the framerate, but most importantly to detect potentiel stuttering issues if this value is very low. It represent the 0.1% of lowest framerates during the whole run.Maximum FPSis very basically the single maximum framerate achieved during the benchmark run
On the right side, you can see a frametime chart that plot the framerate over the duration of the benchmark
This chart can be very useful to detect potential areas of your benchmark run that have performances issues and see the overall stability of the framerateKeep in mind that running the game at unlocked framerate will always be more stuttery than running it with a framerate cap below your GPU max capacity
From that benchmark result page, you can then access directly the options menu to tweak any settings and rerun a benchmark, or quit to the main menu.
If you enabled the benchmark in shipping builds, this tool will also be accesible to the players so that they can quickly check their performances depending on their hardware and with various graphics settings.