Game Instance Setup
To figure out how to proceed, you first need to check if your project is already using a custom Game Instance or not.
Start by opening the Project Settings then go to the Map and Modes section, and locate the Game Instance Class setting.
Then, based on what you see, identify which of the following 3 situations applies to your project:
Situation A: Default Engine Game Instance
What you see: The Game Instance Class setting displays the default GameInstance class

This means you do not have a custom game instance yet, follow Situation A instructions right below.
Situation A Instructions
Situation A
You don't have a custom Game Instance Class
- Open the Project Settings and go to the
Map and Modessection -
Locate the
Game Instance Classsetting and replace its value with theGI_EasyMainGameInstanceclass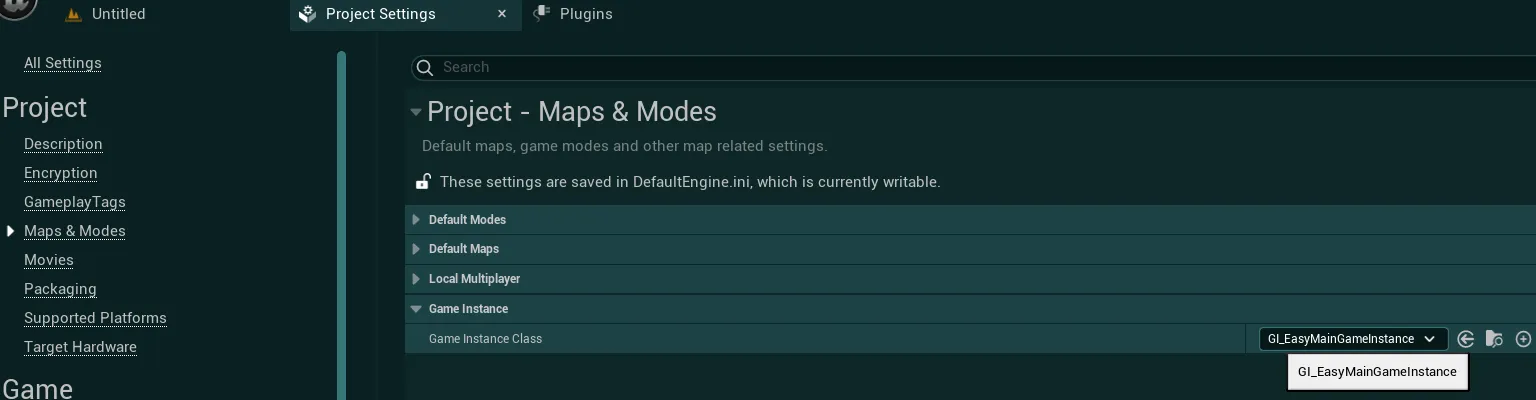
Situation B: Custom Blueprint Game Instance
What you see: The Game Instance Class setting displays a custom name (e.g., GI_MyGameInstance)
This means you already have a custom Game Instance. In this case, open this custom Game Instance and check the Parent Class on the top right corner.

If the parent class is the generic engine GameInstance class, follow Situation B instructions right below.
Situation B Instructions
Situation B
You have a custom blueprint only Game Instance Class
-
Inside your own game instance, click on
Class Settingsand open the Details panel
-
Locate the
Parent Class ”Game Instance”setting under theClass Optionscategory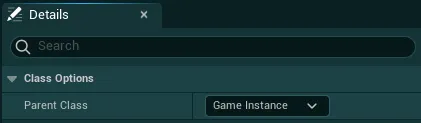
-
Click on the dropdown, search for the
GI_EasyMainGameInstanceclass and click on it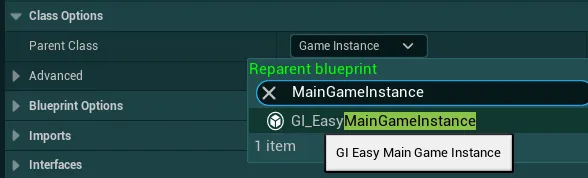
-
Unreal might display a warning popup about the operation, you can ignore it by clicking on
Reparent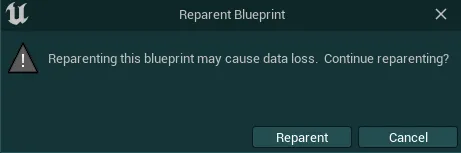
-
Finally, if you have an
Event Initinside your game instance, locate it (Ctrl + Fto search inside the blueprint)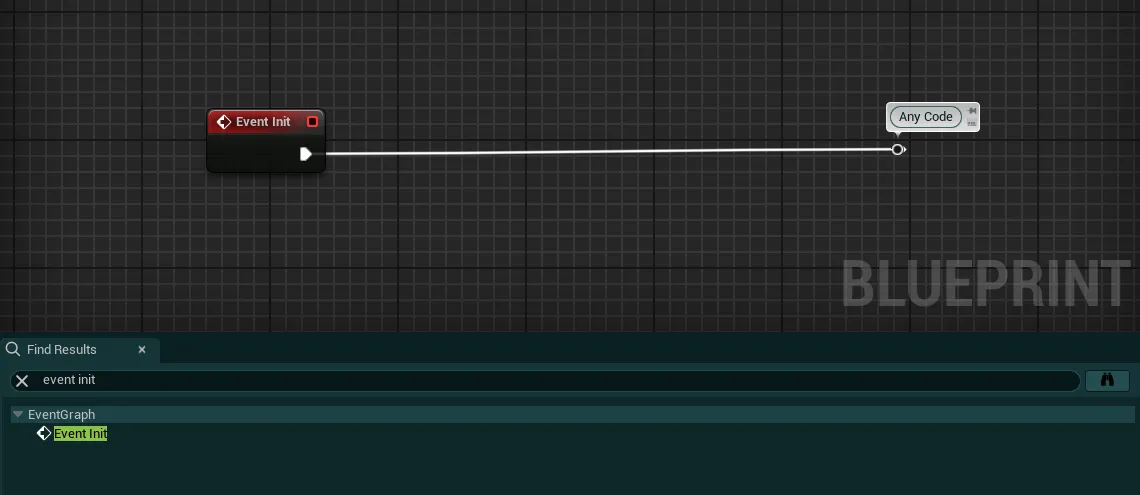
-
Right click on it and select
Add Call to Parent Function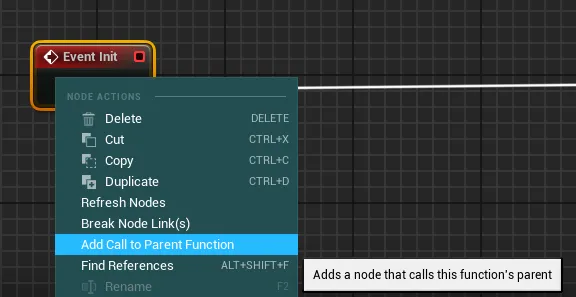
-
Plug in the newly generated node before any of your code like on the image below

With this reparenting process, you can still keep working on your own Game Instance class for all your game logic, you don’t have to transfer or change anything inside the pack’s game instance.
Situation C: Inherited Custom or C++ Game Instance
What you see: You have a custom Game Instance, but the Parent Class in the top-right corner is not the default GameInstance (e.g., it derives from a plugin or a C++ class or is a C++ class directly)

This means your Game Instance is derived from a different class than the default engine class or is a C++ class, follow Situation C instructions right below.
Situation C Instructions
Situation C
You have a custom C++ Game Instance Class (Or BP derived from custom C++)
- Go to the folder
EasyGameUI/Coreand open theGI_EasyMainGameInstanceclass -
Inside this game instance, click on
Class Settingsand open the Details panel -
Locate the
Parent Class ”Game Instance”setting under theClass Optionscategory -
Click on the dropdown, search for the name of your game instance class and click on it
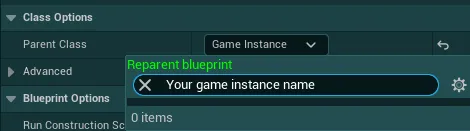
-
Unreal might display a warning popup about the operation, click on
Reparent -
Finally, go inside the
Project Settings>Map & Modescategory and select theGI_EasyMainGameInstance
With this reparenting process, you can still keep working on your own Game Instance class for all your game logic, you don’t have to transfer or change anything inside the pack’s game instance.